
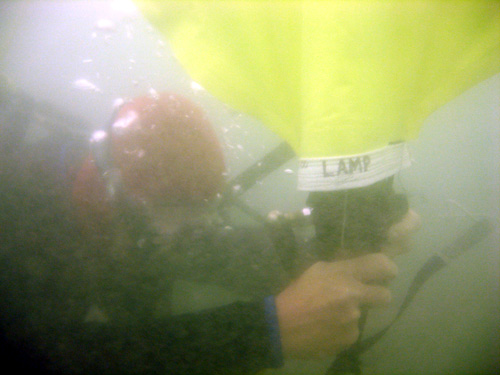
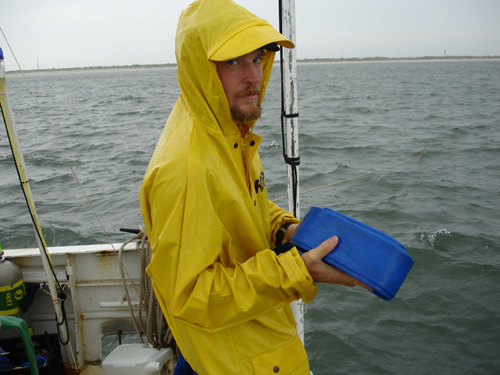
Dr. Sam Turner uses an underwater lift bag to lighten the load of a box of ballast stones. He will swim the stones over to the day’s lifting station, directly under the dive boat, so that the rocks can be hauled to the surface by the crew waiting above. This photograph has been modified with Adobe Photoshop so that viewers can better see the diver and his equipment; if you’d like to see the original version, click below.
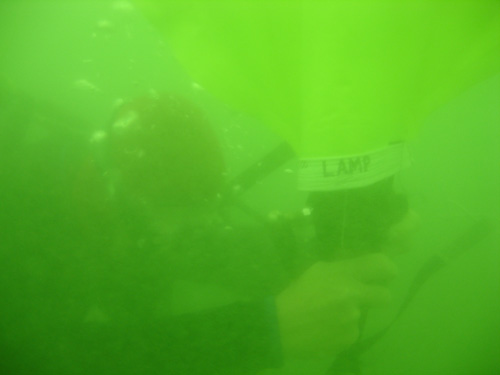
This original version of the photograph better approximates what our divers see in these murky waters. We still consider this good visibility, compared to conditions we often face on this wreck. The visibility often improves and worsens drastically throughout the day.
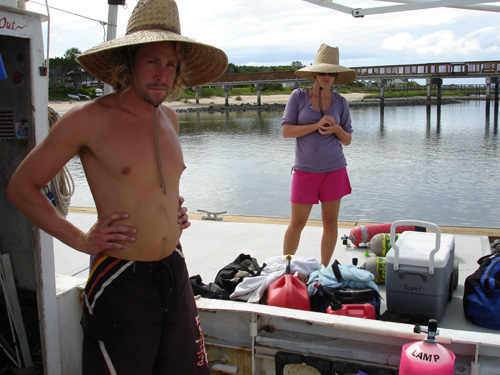
Field School has been over for a few weeks now, but our field season continues. Most of the students have moved on, including Kaia Brown who stayed with us for two weeks additional work. Still remaining are students Chris Borlas (University of Florida) and Wendy Drennon (Florida State University). They are great divers and hard workers and don’t let the traditional inter-state school rivalry interfere with getting good archaeology done on site!
Also continuing to work with us is a graduate of our MARC (Maritime Archaeology Research Class) program that we maintain at the local high school, Pedro Menendez High. German foreign exchange student Florian Funk has been diving with us for about a week, though at the time of this writing he has flown home to Germany, with a solid dive education, a LAMP volunteer t-shirt, and a lot of great memories of working as an archaeologist on a St. Augustine shipwreck.
We’ve had a few rain days which have occasionally forced us in early, but unless we face lightning we carry on with diving operations.
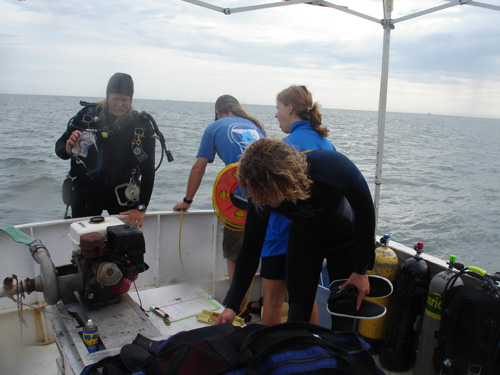
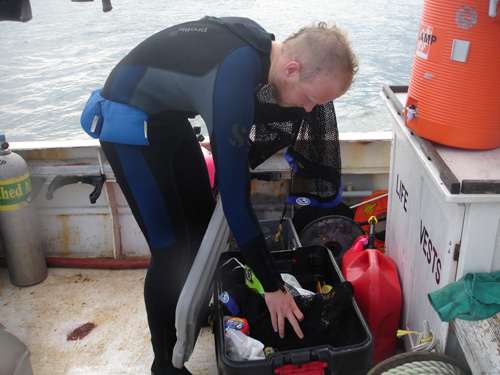
At the start of the day on Thursday July 9th, LAMP Director Chuck Meide prepares to enter the water. If the visibility is decent, he will be taking measurements and making detailed drawings of the hull remains that have been exposed by excavating in Unit 3. This year we are digging a trench, composed of up to 9 units at this time, directly across the shipwreck. Once we dig all the way down to wooden hull timbers, we cover them with sandbags to protect the wood until the visibility is good enough to make a drawing or take photographs.
Here is a brief video clip of Chuck drawing in Unit 3. He takes a measurement, say the width of a frame or rib, then scales the dimension down on his underwater paper and continuously adds to and modifies the drawing to create the most accurate reproduction of the hull as possible. Every tool mark and fastener hole is of interest to the archaeologist. This is a very detailed scaled drawing, and it usually takes hours to fully record a one meter square unit, especially if the visibility is poor. Chuck started this particular drawing days ago and finally finishes it today, after a 4 hour and 18 minute dive.
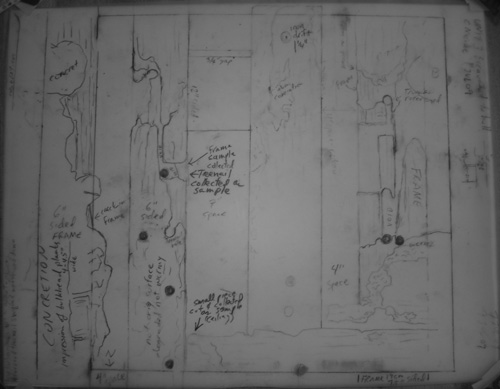
This is the final drawing of hull remains in Unit 3. What is depicted here are four frames (frames are typically called “ribs” by landlubbers) which run from top to bottom of the drawing in this view. At the bottom right side of the picture there is a layer of ceiling planking, which covered the upper portions of the frames. The black circles are a type of wooden fastener, called a treenail, which were used to attach the upper ceiling planking and lower hull planking to the frames. They are basically hand-carved wooden dowels pounded into pre-drilled holes in the frames and planking. When exposed to seawater the treenails swell and make a watertight fit. On the left side, a large mass of metal has formed a concretion which obscures most of the frame which it sits on. Visible in the concretion are the impression of vertical wooden planks which used to form a bulkhead or wall at that point. What appears to be the keel is visible between two of the frames, suggesting that we are at the centerline of the vessel. Also apparent from this drawing is that this ship suffered a violent wrecking process: all of the frames but one display severe damage and were broken during the shipwreck. This damage is most apparent in the second from the left frame and the one furthest to the right. The breaking of the frames here also explains why there is a large amount of ceiling planking which is no longer in place within this unit. In Unit 5, by contrast, the entire bottom of the unit is covered in a smooth floor of ceiling planking, completely covering the frames beneath.
Here is another video clip, this one showing Wendy using the hand-held suction dredge to excavate in Unit 5. She and LAMP archaeologist Brendan Burke were excavating in Unit 5 while Chuck was drawing in Unit 3. Wendy carefully digs with her ungloved hand, either fanning away or gently removing sediment by hand, and holds the dredge so that it sucks up the cloud of sediments she is displacing. The large corrugated hose on the right side of the video screen is the dredge intake hose.
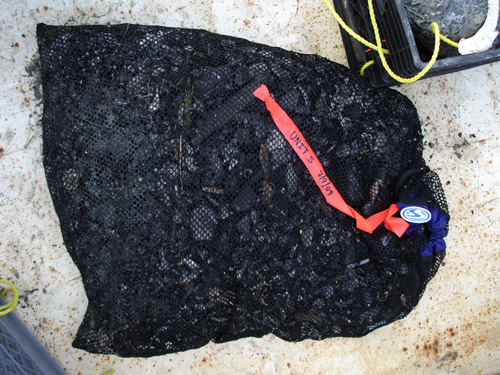
Water, shell, sand, and other objects (sometimes including crabs and fish) are sucked up through the intake hose and through the dredge head to be rushed down 50 feet or so of exhaust hose, where everything is collected in a mesh bag attached to the end of the exhaust hose. In this limited visibility, it is easy for the diver to miss small artifacts, such as tiny chips of coal, and with the mesh bag in place we won’t lose any such artifacts. This is the bag of shell hash that is left over from Wendy’s excavations in Unit 5. During the Field School we had our students sort through these bags on the way out to and back from the site (it is an hour long boat ride on the Roper) but now that we have lost most of our student labor we are saving the bags for volunteers to sort through back at the Lighthouse.
If you are interested in helping us with our archaeological research and perhaps making the next big maritime discovery by volunteering to sort through dredge spoil, please send an email to our Volunteer Coordinator, Debe Thompson.
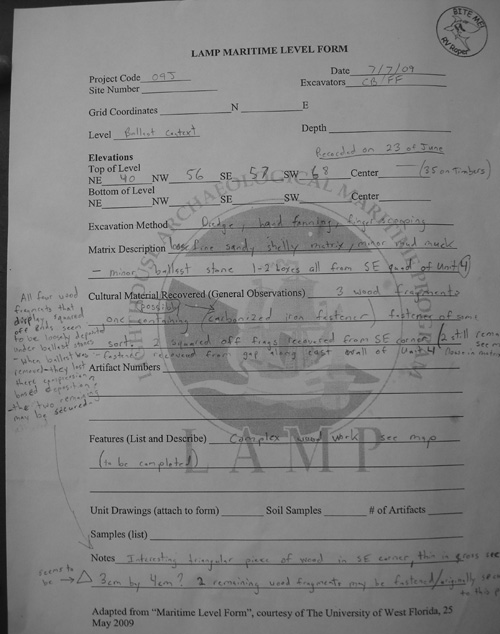
In addition to the work of sorting through dredge spoil, there is archaeological paperwork to be completed as well. This is an excavation form that the divers fill out after dredging a unit.
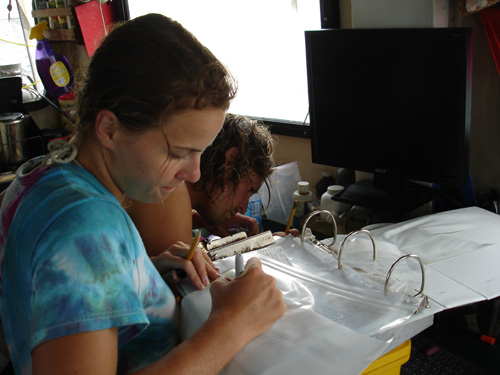
More paperwork! Wendy is labeling a plastic bag and filling out an artifact log sheet in the binder. Artifacts encountered during excavation are usually collected by the divers. All collected artifacts are carefully brought to the surface in clear plastic bags. Once back on the boat, individual artifacts are assigned artifact numbers and placed in a labeled bag. Inside the bag goes a separate labeled tag, just in case the sharpie writing wears off the outside of the bag. And each artifact is listed in the Field Artifact Catalogue so that we can keep track of everything.
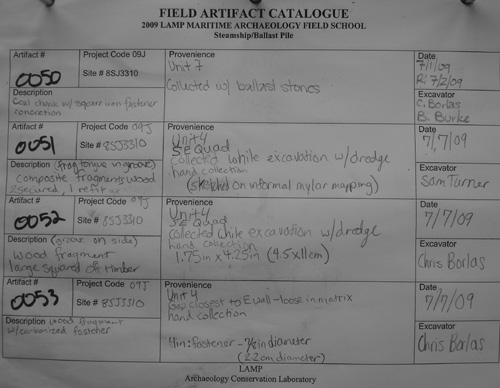
An example of a completed sheet from our Field Artifact Catalogue. It is vital for the ensuing archaeological analysis that we have good records of every artifact recovered from the site, with its exact provenience or specific location.
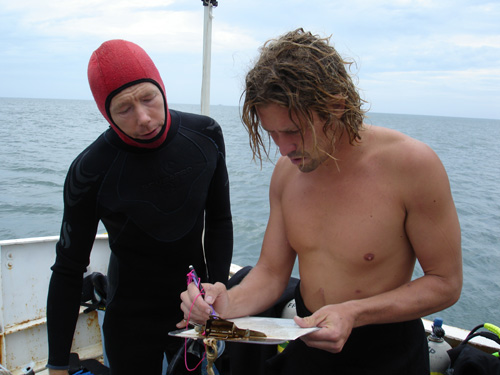
Sam and Chris have a quick discussion before entering the water, planning their next dive.
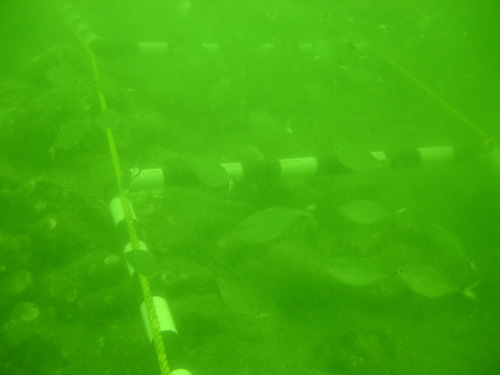
Underwater, the vis is still pretty good. Our trench is defined by two parallel yellow polypro lines, with PVC grid squares attached.

The divers approach Unit 5 to continue excavations there.
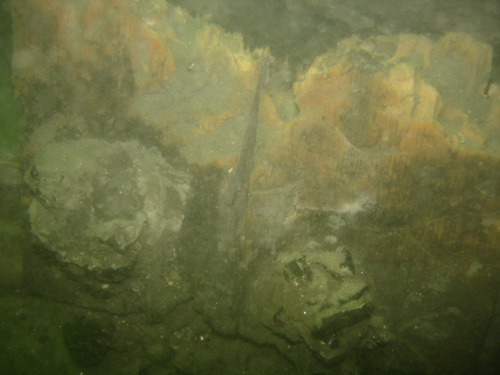
By the end of their dive they have fully uncovered what turns out to be an interesting feature, the remains of a wooden bulkhead fashioned of vertical, tongue-in-groove planking. A bulkhead is simply a wooden wall erected inside the hold of the ship, designed to compartmentalize the hold. This picture shows two of the bulkhead planks protruding up from the ceiling planking. Just the lowermost parts of these planks have survived, but enough is left to allow us to reconstruct how this bulkhead was situated in this part of the ship.
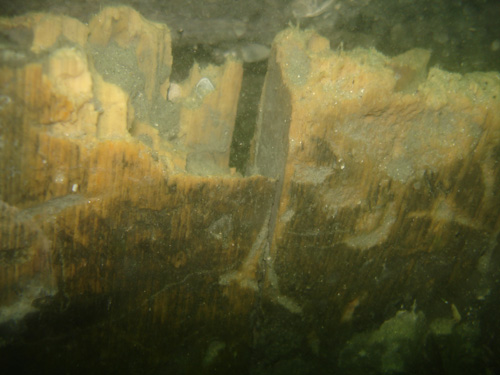
A close-up view of the upper surviving edges of the bulkhead planks. They range in size from 4 to 4.5″ wide.
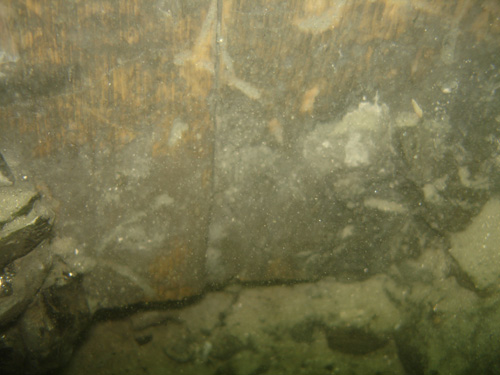
A similar close-up view of the bottom ends of the bulkhead planks.
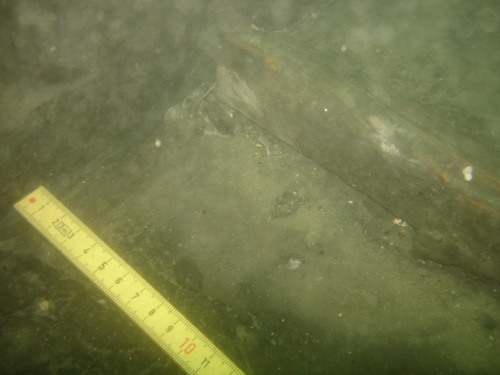
The bottom end of each bulkhead plank is nailed horizontally to a “nailer,” which is a narrow timber fastened directly to the ceiling planking running the length of the bulkhead. The nailer is seen in this picture, on the right side and parallel to the yellow scale. This photograph was taken in Unit 4, where the planks are no longer in place or attached to the nailer. The nailer runs into and ends at a heavy stringer, or longitudinal strengthening timber, which also sits atop ceiling planking. This means that the bulkhead also probably ended at this point in Unit 4 (though closer inspection might show signs of the bulkhead on top of or on the other side of the stringer).

On a previous day of diving, when we were excavating in Unit 4, divers found and carefully recovered a plank end which displayed tongue-in-groove construction. At the time we did not realize this was a bulkhead plank, and we were in fact not even sure if it was a part of the ship’s structure or some item carried on board. But now it is apparent that this was another plank base from the bulkhead as it is virtually identical in size and form to what we have encountered in Unit 5. Here Brendan points out the tongue-in-groove shaping on the side edge of the plank fragment.
In addition to excavating sediment and documenting artifacts and hull remains, another common task on this project is rock-moving. Excavators continuously remove rocks while they are digging, and place them into numbered lifting crates. These are weighted milk crates rigged with lifting handles of polypro line and window screen to prevent the loss of small artifacts that might be attached to stones. We often have many empty, full, and partially full boxes on the sea floor at any given time. On a regular basis we assign to a diver the task of moving these boxes from the excavation trench to the lifting station, set up directly under the boat. In this video clip Sam has attached a lift bag to a box of rocks, and partially inflated it so that the box of rocks is close to neutral buoyancy, which means it neither floats upwards or sinks downwards. At this point it is easy for a single diver to swim it towards its final destination.
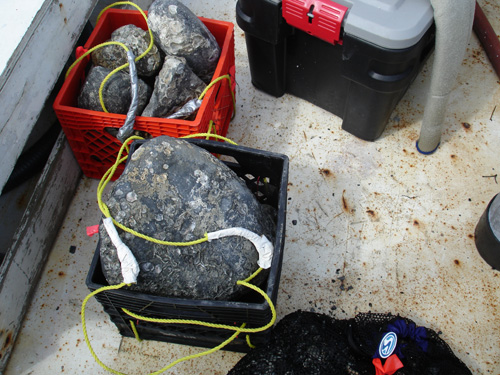
Sam is busy and soon the boxes begin to pile up on the deck of the Roper. Some of the individual stones are enormous, such as the one here in the center of the picture.
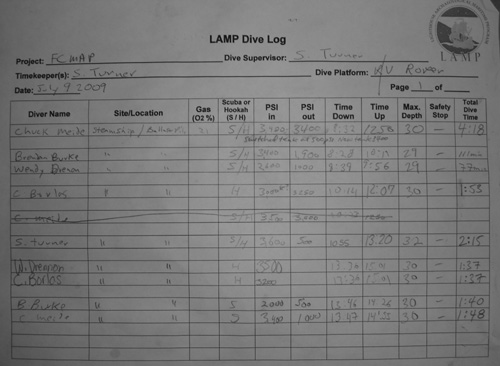
Other paperwork filled out on a daily basis are the boat’s daily log and the dive log, which is pictured here. On this day, we logged a total of 18 hours, 16 minutes of bottom time, not a bad day’s work (especially for a day we had to leave the site early)!